Showing posts with label student engagement. Show all posts

Thursday, July 10, 2014

Beginner's Guide to Padlet

Although I've posted about Padlet before, I couldn't resist sharing materials I recently created for a presentation.  (Interested in a screencast about Padlet?  Check this out, created by my friend Jennifer Plourde.)

What is Padlet?  http://padlet.com/ is a website that allows users to build a wall that can be written on with “sticky notes.”  Users can post to the wall, adding words, links, pictures, or documents. Each wall has a unique URL that can be customized to be easier to find or to remember.
Want to write on a Padlet?  Add a post here!  To post, just double click anywhere on the page.  The top part of the note is  for your name, and the bottom part is for the answer to the question. 
Check out my last post about Padlet, which includes ideas for classroom use.

1.  Making an account


2.    Complete your profile.  Please note that user names need to be fewer than 15 characters. 


3.  The Dashboard


4.  Making a wall:  Create the Padlet

5.  Modify Your Wall (Part 1)

6.  Modify Your Wall (Part 2); Click “modify wall” or the gear to see the menus below


7.  Modify Your Wall (Part 3):  Privacy

8.  Some Considerations
  • What is the purpose of the wall?  For a warm-up in the computer lab for example, you will not want to moderate posts, and can set appropriate expectations for posting.
  • Do you want to password protect the wall?
  • Do you want to link the page to your school website so that students can have easier access to the page?
  • What sorts of projects could students create using padlet? 
  • Do you want to embed a padlet on your web page?
  • Do students know how to make accent marks for posting?
  • Documents become pictures, so this is a great way to share documents but does not work well for document storage.


    • Sunday, April 27, 2014

      20 Grouping Ideas for the World Language Classroom

      In the world language classroom, it is critical to get students talking and listening to one another.  Here are twenty grouping strategies to encourage teamwork, team building, a positive class culture, and communication.  I'll be sure to do another post on group work structures, which help to make many of these grouping strategies more effective.

      1.  Permanent seats:  Groups of 4.  Choose groups carefully; each group should have a student leader and be diversified for skill level and student characteristics. I found it best to have a high-performing student with two typically middle-level students and one lower-skill student.  The higher and lower should not be next to each other. Place students strategically so that best friends are separate or across the room facing in opposite directions.  A group of four allows for interactions with three different people, easier management,  and creates an environment focused on student-centered learning.  I never liked groups of three, and would rather have a group of five.  I occasionally used groups of six, but found groups of four to be the most productive. 

      2.  Group by learning preference or learning style.  Give students a learning styles survey; for certain activities, put students in groups based on how they learn, and give them an activity that suits this learning style.

      3.  Skill level.  Based on a pre-test, group students for activities designed to match their mastery of objectives.  These groups are flexible and will vary each time.

      4.  Interest.  What do students want to learn about and/or what is their focus for a project?  For example, group the students who love skateboarding to create an advertisement for their favorite skateboard park.

      Random groupings
      These can be tailored to fit the unit of study and can be more complex for each level.  Students get into one line by communicating solely in the target language. These groupings can last three minutes to an entire class period, depending upon the activity. You can then break students into smaller groups to suit the needs of the activity, maybe groups of two or groups of four, or even larger. Ideas for random groupings:

      5.  Hair color.  A way to review appearance vocabulary. 

      6.  Deck of cards.  You can sort students by card grouping or by suit. 

      7.  Number of siblings.  Review of family.

      8.  Rating scale.  Ask students - how they feel about certain topics, and rate from highest to lowest.  In level 1, it could be "pizza."  In a higher level, it could be a question about which cultural practice is preferred.  You could do a number of questions like this in a row, and ask students to make comments in the target language throughout the activity. 

      9.  Number of buttons on an article of clothing.  A fun way to review clothing and create conversation. 

      10.  Mood for the day - happy to grumpy.  This would be a great way to connect with students on a personal level.

      Get them moving!
      These are groups that allow students to get out of their seats and having conversations with each other.

      11.  Inside/outside circle.  Line students up facing each other; I usually ask that they "high five" so they are certain who their partner is. Give them a prompt or a survey to complete. Rotate to communicate with different partners.

      12.  Four corners.  Ask students to choose one of the four corners in the room, where you have placed different labels.  Again, this can vary by unit of study.  Favorite season in level 1; weekend rating scale in level 2; favorite character from a story in level 3; most important environmental issue in the target country in level four.  You could then give students a task or conversation questions.

      13.  What's your favorite....?  Place a different picture on each group of four.  As students walk in, have them select their "favorite" of the series. Then, give them a series of questions to discuss or answer within that group.

      14.  Stations.  Make each table of four desks a different activity.  Require students to complete, for example, any five of those activities.  They can move on as they finish.  Ideas for stations:  Listening station, game review, reading activity, practice quiz, computer task, etc.  Or you could have stations to learn about a time in history, such as music, literature, or historical figures. 

      15.  Gallery walk.  You can use this for students to produce work or to review and discuss each other's work.  To create work, put a number of large posters around the room, either on each table of four or on the wall. Ask students to fill in vocabulary about a topic, or give a one-word answer to a question.  Groups can rotate as they finish or based on a timer.  To review work, ask students to place their work in visible places, and then discuss with a number of classmates.  A worksheet is helpful for students to write their feedback.

      Ideas for groups of four

      16.  Student-chosen groups.  I would rarely let students choose their own groups (except for interest-based activities), but would do it on occasion.  I found this a helpful "carrot" for getting students to finish certain activities.

      17.  Conversation tables.  Put a tented paper on each group of four with questions for students to ask and answer of each other.  You can ask students to record a partner's answers or assign a recorder the task of summarizing group responses.

      18.  Dice.  I loved to give prompts with dice.  On the board, 1-6 would each have a different task, and occasionally, a second die would have different characters.  Students complete the random prompt based on chance.

      When all else fails...

      19. Who's your favorite____(team? singer?)?  Create teams based on student responses to preferences, such as "Yankees or Red Sox?"

      20.  Ask the students for ideas!  Give them an exit slip to create different groups.  You will get many ideas from them.

      I hope these grouping ideas can improve your class culture, energize your students, aid learning, enable teacher facilitation, and increase communication.  What grouping strategies have you used in your classroom? 

      Saturday, February 15, 2014

      Connecting the World Language Class with Authentic Speakers

      Connecting with authentic speakers is the ideal way for students to communicate meaningfully in the target language.  Much of this post was inspired by the recent #langchat on Twitter.  I have credited the ideas to the teachers on Twitter; their handles on Twitter are listed below with the "@" sign.  I highly recommend you follow them if you are not already! 

      To begin:  How do you find authentic speakers?  Contact with your local French resource center or your chamber of commerce to find local native speakers, like @profecochran did for a recent project.  @CatherineKU72 recommends "cold emails" to principals of schools from the target countries.  Use Twitter.  A number of the sites listed below also have ways for teachers to connect to the target culture. 

      Here eleven ideas for connecting to authentic speakers:

      1.  SKYPE or Google hangouts.  Classrooms can SKYPE or do Google hangouts with other classrooms, teachers, or professionals in the target culture (the Google idea isfrom @CatherineKU72).  With schools, students can swap languages in each or every other chat. With guest speakers, ask students to prepare questions in the target language or create a listening sheet for students to record their learning.  Choose the topic in advance (idea from @cecilelaine).   @Cforchini created a SKYPE exchange using @SKYPEclassroom.  

      2.  E-pals/video exchanges.   This type of asynchronous exchange would enable students to communicate with other classrooms when it is convenient for the class.  Many sites allow teachers to monitor the communication or to act as intermediaries.  Two favorites:  Pikifriends or E-Pals are for written communication.  Or find a school in the target country and do a "video" exchange where students prepare videos for each other.  

      3.  Quadblogging.  What is it?  Four classes around the world take turn hosting a blog that the other classes comment on.  When you sign in, the site makes it easy to connect to other schools in desired areas and languages.  Follow the founder on Twitter:  @DeputyMitchell. 

      4.  Local brochures.   Contact your local chamber of commerce, and ask to create brochures or websites in the target language for visitors from other countries, as recommended by @AHSblaz.

      5.  Connect to native speakers on Twitter.   Ask questions of celebrities, academics, athletes, or students from other countries.  Share questions and responses with students, or ask them to do the writing and sharing.  This idea from @AHSblaz and @frenchteacher11. 

      6.  Community service component.  Connect with local native speakers and require students to do a service project.  Thank you @BPort_Modlangs for this idea!  Is there a local society dedicated to the language you teach?  Contact them to create ideas to connect students to the target-language-speakers in your community. 

      7.  Edmodo/wikis.  Create a closed and safe place for students from the target culture and your classroom to interact online.  @crwmsteach requested a native classroom through Edmodo.  You could also create a wiki (my favorite is from PBworks).  I created wikis for student exchanges, and was able to share the materials with all of my classes (including those who did not participate in the experience). 

      8.  Collaborate on publications or projects.  @AHSblaz recommends finding a class with which to create an online magazine.  The common creation of content would be powerful, especially with the expanded audience of the public forum.  Online magazine sites:  Joomag, Issuu, Yudu.  Or, as @nico1e shared, schools could complete a film project shared across a theme.

      9.  Connect with students who are studying abroad.  After about five years of teaching, I was lucky to have a few students who were studying in France and were still in touch with me, and thus my students were able to share in the experience.  With one class, we wrote questions to that the college student who responded in French.  Stay in touch with former students, or contact a local college to find a student who is studying in a target country.

      10.  Voicethread.  When you have class connection in the target culture, ask them to contribute to a voicethread created by you or your students. 

      11. Student exchange.   Create an exchange where students from the target culture stay in your community, then you and your students travel to visit them.  This experience is very rewarding (I participated in and helped to organizes five cycles), and worth the effort.

      These are some ideas for classrooms to connect with authentic speakers of the target language.  How many have you used in your own classrooms?  Which ideas are your favorite?  What are other ideas do you have to share? 


      Tuesday, February 11, 2014

      15 Tips for Organizing Student Travel

      I've been lucky to travel with students a number of times to France and Québec.  Here is my best advice: 

      Before the trip:

      1.  Collect more money than the trip costs.   This gives wiggle room for price increases or unforeseen expenses.  (Call it the trip "slush fund.")  I suggest an additional $100 per person, and refunding any excess after the trip was finished.

      2.  Call your cell phone carrier.  Especially for international trips, try to get a prorated plan for data, texts, or calls (when possible).  This temporary international plan can prevent an unexpected bill.  Please note that not all cell phones will work abroad; here is a useful article about cell phones.

      3.  Give out your cell phone number.  With student safety as a priority, I always gave my cell phone number to students and their families.   I made it clear that this number was only for use during the trip, and never had student or parents use it inappropriately. 

      4.  Procure at least $100 in local currency.  It's always a good idea to go with cash in hand. After arriving, I would use my debit card to take out cash at a local ATM. 

      5.  Create a checklist and packet for student documents.  Collect and make all of the documents students will need and put them in the same packet; keep track of these documents with a checklist.

      6.  Share cancelation information from the get-go.  Be sure to tell parents what they will lose when they cancel or if the district cancels the trip.  Having this in writing will also make it easier for you as trip planning moves forward. 

      7.  Set appropriate expectations.  When meeting with students and their support systems, share pointers for the best travel experience; what to expect in the airport, hotels, homestays, bathrooms, etc.  Sharing information and anecdotes in a positive and truthful light will lead to a better experience for everyone.

      8.  Register with the country's consulate.  This is just in case, for example, a volcano in Iceland stops trans-Atlantic flights. 

      9.  Create a web page, wiki, or use Edmodo, etc., for trip information.  Be sure that everyone can access this site, and share trip planning information on it.  It is helpful if you use a medium that gives users notifications of changes, such as a wiki. 

      During the trip:

      10.  Update your trip web page daily.  The first year I did this, I had three parents hug me when we returned.  This action helps the community stay connected to this important travel experience, and builds support for the world language program. This did impact my own sleep, but was worth it! 

      11. Enjoy.  You are there!  Live in the moment and only handle problems if they arise. 

      12.  Trust your gut. Think your tour guide might be missing something?  Speak up.  Worried those three students who are late might be in trouble?  Call them. 

      After the trip: 

      12.  Plan a trip celebration.  Have a pot luck dinner or gathering with students, their families, and friends, to celebrate the trip.  Show pictures and give superlatives. 

      13.  Connect with your classes.  Create lessons and activities that allow students who were unable to go on the excursion to learn from it.  Share videos, do activities with the trip web page, or even have students share their memories. 

      14.  Make a list for the next time.  Write down your recommendations and changes for future trips immediately - this is a gift you give yourself when you start to plan future student adventures. 

      15.  Refund money.  Look back at your trip receipts, and refund the extra money that was not spent. 

      I encourage all world language teachers to travel with students, and hope these tips are useful.  I must note that I could not have learned any of this without the help of my mentor and friend, Dorothy Raviele.  Have you planned student trips?  What is your advice? 

      Monday, January 27, 2014

      Two Truths and One Lie for French 1

      Students in my school began learning second languages at age fourteen.

      The first day of French 1 was seriously a hoot FOR ME.  Me: Verbal and physical gymnastics.  Students: Bewilderment and occasional joy.  It took me a few years to register how overwhelming this new subject and new type of learning could be.

      I then settled on teaching students these three ideas (in French, with pantomiming), from the beginning.  The first days got better and better after this change.  Here are the three most important things for students to realize from day 1 of level 1:

      TRUTH #1:  Confusion is normal when learning a new language.
      When I started expressing this idea to students, I saw immediate relief and the release of anxiety.  I tell students to try to get "the gist" and tell them that, at the beginning, understanding even 10% is a victory.

      TRUTH  #2:  You will never understand everything that is said in this world language class (AKA - the confusion never ends).  This is connected, of course, to truth #1.  However, this becomes more important over time.  Students need to know that the learning process in a second language requires that their language skills be constantly stretched. The classic i + 1.

      LIE #1:  This is not my lie - but...I reveal that the student who seems to understand everything is...FAKING IT.  That student who nods and smiles and seems confident is...also lost.

      What do you do to help your beginning language learners?

      Wednesday, January 22, 2014

      Energizers

      Teaching an 84-minute class to teenagers can be, well...boring.  84 minutes in one place can make anyone antsy, especially teens.

      In order to combat fatigue, encourage team building, provide consistent review, and support brain-based learning, I used a number of "energizers." These were similar to "SPONGE" activities that were popular in the nineties.  I also used the well-known texts, "Reaching All By Creating a Tribes Learning Community" and "Kagan Cooperative Learning" as inspirations.  Each activity lasted one to five minutes, always involved movement, and resulted in beautiful, energetic chaos for a short time.  Sometimes the energizers connected directly to the current unit; at times they were from prior activities or topics. 

      I used these activities:
      • When eyes were glazing over
      • When I needed to answer the phone or talk to an administrator
      • Before teaching something that would require intense concentration
      • When students requested them
      • For transitions between activities
      I left the one file that contained all energizers open on my computer, making it easy to project one at a moment's notice. 

      Keep in mind that these activities were used in a French class, but could be modified for any classroom. 

      My favorite energizers with ideas for modifications in other subjects and levels:
      • Touch.  List objects and colors; partners instruct their peers to touch items around the room, and commend them for correct responses.   Modifications:  Students touch various posters around the room, ask trivia questions and touch posted answers, practice giving commands, etc.
      • Q & A.  List questions and an answer word bank.  Students stand in either a line or a circle with a partner across from them.  Students ask and answer questions, and switch partners after a few minutes. Can be used for quiz review, getting to know partners, warm-ups, etc.
      • Fake sports.  When facing a partner, students pretend to be playing a sport, with an invisible ball.  This seems strange, but it really helps the classroom to "gel," add unexpected fun, and leads to better learning AFTER the activity.
      • Toy toss.  Each group of four gets a stuffed animal, tossing the animal back and forth.  When the music stops, the student with the toy has to answer a question.  These can be fun questions, warm-up questions, or review questions. 
      • Mirror.  In pairs, students mirror the actions of a partner. Dancing, miming, charades, etc.   Switch roles.
      • Who's the boss?  Students give commands to a partner, who must follow the command.  In lower levels of French, I would use items like, "Dance the Macarena."  They switch roles.  Modification:  Students require a partner to review certain facts, "Name three planets in the solar system while jumping on one foot."
      These are a few of my favorites.  How can you use or how have you used energizers in your own classroom?

      Monday, June 24, 2013

      Optional & Relevant Homework: A Path to Improved Culture & Performance

      Switching to optional homework in year five of my teaching career was the absolute best thing that I ever did in the classroom.  That one, successful risk, gave me the confidence to think outside of the box and to experiment in order to meet the needs of students.  It also pushed me to focus on relationships with students and to choose relevant assignments based on performance.  


      Why I did it:  A workshop about effective teaching strategies made me rethink the basic principles of my teaching.  I realized that assigning, monitoring, and assessing homework was taking up too much time, and instead of improving student performance, it was hindering motivation and was ineffective in its most basic aims.  In one sentence:  Homework was a major downer for my students and for me.  I tackled the problem in two ways:


      1.  Most homework assignments became optional. Thanks to the school’s online grading system and my use of “total points,” it was simple to make optional assignments “invisible” in the gradebook.  I explained to students the “bank” of homework.  Completing homework would lead to a better mastery of skills, higher grades on assessments, and an increased overall average.  These points also provided a cushion for lower grades on various assignments.  Completing fewer homework assignments meant fewer points in the bank, and thus other activities would have more weight.  


      2.  Homework became more relevant.  Instead of the typical workbook pages or worksheets, I worked to make homework more accessible and individualized, based on choice and skills.   This process continued to evolve based on learner feedback and skills.  


      How did it go?


      The initial response was puzzlement.  Overachievers were angry (and relieved) and underachievers were convinced I was an idiot.  Parents thought that I was lazy and crazy.


      Immediately, class culture became more positive and my relationships with all students got better.  I could not believe it.  Those students who had felt unprepared or ready for the zero from the initial homework check now walked into the room happy and excited for the day.   All students realized that their achievement and growth were my priorities, and that if they worked hard in class, they would do well.  It was like we all took a collective sigh of relief and then  were able to focus on learning.  


      And, I know it’s hard to believe - but - all grades GOT BETTER,  including overall grades.  I realized then that all homework I had given in the past had been ineffective.  


      My evolution
      The next few years (and even now), I have continued to work on motivation, and creating assignments based on student performance.  Last year, I experimented with goal-setting and students designing their own homework assignments and personal penalties for lack of completion.  


      I am still trying to find the magic formula.  How can I get students to learn on their own without penalties from the teacher? How can we work together to make the most relevant homework assignments that will improve student performance?  I am excited to continue to figure out how to best meet the needs of all students.  


      Wednesday, June 19, 2013

      Using Mobile Devices with Socrative Replaces "Clickers"

      Socrative (www.socrative.com) is a free website for assessments that can be given via computer or with mobile devices.   


      How does it work?
      Sign-up is easy and free.  Below is a picture of the dashboard, which gives teachers the option of preparing questions in advance, asking one question orally and having students respond, giving pre-designed items, or using and editing quizzes created by other users.  


      How do students access the questions?
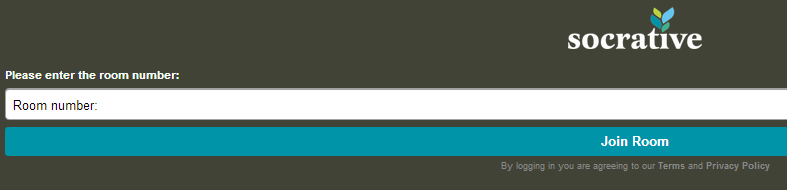
      When creating an account, teachers receive a room number that never changes.  In order to take the assessments, students login to the student portal through http://m.socrative.com/student/#joinRoom or by clicking on www.socrative.com using the teacher room number. (See the image below.)  


      What’s great about Socrative?
      • No student emails or accounts.  Students only need the teacher room number to access the materials.
      • Downloadable results.  For every assignment, students must enter their names.  When the assessment in finished, teachers can download student responses.  
      • Oral questions.  Unlike on similar sites (such as www.polleverywhere.com), teachers can ask a question orally or use pre-made items, such as the exit ticket.
      • Multiple questions.  Assessments can be made with a number of items.
      • Computers or mobile devices.  Students can respond with a computer or cell phone; if there are not enough devices in a class, different students are able to take the assessment on the same device.


      Caveat Emptor (Does that apply to something that’s free?  But I digress...)
      • Teachers must start quizzes for students to access them.
      • Only 50 users per activity.
      • Requires the internet.
      • Survey results are not “pretty” and in real time like they are on PollEverywhere.


      Ideas for Socrative
      • Poll students at the beginning of class about the order of class activities.
      • Ask students to create quizzes for the class as a homework assignment; use this as an opening activity.
      • Ask questions that resemble those on an upcoming quiz and use the data to plan a review class and to group students for activities.   
      • Exit tickets.  Use this feature to get feedback on class activities.
      • How is class going?  Survey students on your performance or their performance, and use the results to shape class structure.  
      • Interest surveys.  In order to discuss concepts in class, create interest surveys, then students share and analyze the results in small groups.  


      Review in a nutshell:  Although the dashboard is a tad clunky, Socrative is great for formative assessments that inform classroom instruction, and it makes “clicker” systems unnecessary.  


      Sunday, June 16, 2013

      Padlet: Online Wall for Collaboration

      What it is:  http://padlet.com/ is a website that allows users to build a wall that can be written on with “sticky notes.”  Users can post to the wall, adding words, links, pictures, or documents.  Each wall has a unique URL that can be customized to be easier to find or to remember.  


      Some questions and options to consider when building your wall:  
      • Backgrounds:  Which fun background will you choose?
      • Positioning of posts: Do you want them random or ordered? (I personally like them haphazard.)
      • Access: Which visitors can access your wall?  Email invites only, password protected, public, or public and hidden?
      • Power Can visitors view, add to, or edit the wall?  Will posts be moderated?
      • Location:  Will you embed your wall into your webpage or blog or share the link?


      What I like:
      • Padlet is great for brainstorming or collaboration in real-time
      • Users can create walls without accounts (but it is easier to track walls with an account)
      • Walls can be password protected and moderated


      What I dislike:
      • Documents added to the wall are turned into pictures, so Padlet is not for document storage
      • As each wall is only one page, they are best used for just one assignment
      • In the past, I found that walls or “Wallwisher” would occasionally be unavailable, though I have not found that to be the case since this site became “Padlet”


      Ideas for the World Language Classroom:
      • Brainstorming session.  Give students a theme, like “vacations,” and ask them to add words, expressions, sentences, or paragraphs related to the topic.  This can be done in class while all in the computer lab, or at home for a homework assignment
      • Project presentation.  Instead of a typical poster, student groups can use this wall to create a visual accompaniment to their project.  .
      • Class opener/closer.  Begin or end a class (perhaps in the computer lab) by surveying students on their learning or interests
      • Question(s) about reading.  Post questions about a homework assignment, and require students to answer the question and also respond or comment on the posts of classmates
      • Advertising campaign.  Students create an infographic to convince users in the target culture to use a product  


      Review in a nutshell:  Padlet is an easy-to-use, visual tool that is a great jumping-off point for online collaboration


      Sample walls (from the Padlet website):


      Thursday, June 13, 2013

      Flipping the WL Classroom: My Experience

      The Flipped Classroom
      In the flipped classroom, students do the easy part at home - view the material - and use class time for the more difficult task of learning the material through small-group discussions and guided application. The teacher is present to facilitate success with new learning.  This classroom is “flipped” from the traditional model, where students often do the lower-level learning in class and the more complex parts at home.    


      How I used it:  I employed it for teaching about culture or reinforcing grammatical concepts through videos.  For each assignment,  I created a page on my school website and a worksheet. In class, I demonstrated how to access the materials and reviewed the process for completing the assignment.  


      Activity structure:  Students would often have the choice of which videos to watch, selecting two of the three videos on my school webpage. I structured worksheets so that students shared opinions and made connections with the material.  Sample assignment below.  


      What I liked:  These activities were time savers; in class, we would discuss the ideas and concepts in the videos instead of wasting class time while watching them.  I found that the cultural videos were most successful (the highest completion rate) of all of my flipped activities.  


      What I disliked:  I had a low success rate with reinforcing grammatical concepts through “flipping.”  While initially excited about the homework to watch clips, students ultimately were bored, frustrated, or uninterested in watching anything related to verb conjugations or grammar.  This could be due to my choice of videos.  I had more success with “relevant” material.


      Review:  A very useful structure that is most successful when meaningful and personalized.  I will definitely continue to employ this technique in my future teaching.  


      ______________________________________________________________________________

      Online “Viewing:” French Kissing
      For homework, you must go to my school website and watch any three videos listed on the French 1 page under “French Kissing.” You may (as an option) complete some of the online practice that is linked on the page.  Please fill out the worksheet below so that we can track your learning.  Be prepared to share your experiences in class.  http://www.bristol.k12.ct.us/page.cfm?p=1166
      Video 1
      Video 2
      Video 3
      Video Topic
      Before you watch the video:
      What do you already know about this topic?
      While you watch the video:
      Write down 3 things that are interesting to you during the video.  Write down information about the content.
      After you watch the video:
      What did you find surprising about the video?
      How you will be graded:
      Task
      10 points
      8 points
      6 points
      Completion
      100%
      Mostly complete
      Somewhat complete
      Task completion
      “Above & beyond”
      Thoughtful, relevant, & personal answers
      Evidence of watching the video
      “Appropriate”
      Thoughtful answers
      Evidence of watching the video
      ·Sloppy”
      Completed without thought
      No evidence of viewing the resources
      Timeliness
      On time
      1 class late
      2 classes (or more) late
      Your Grade
      BONUS +1:  What was your favorite online practice game and why?  __________________________________________________________________________


      Videos used: